Overview of Kali Linux
The first operating system we’re going to install in our lab is Kali Linux. Throughout the blog series, we’ll use various hacking tools. You can install these tools manually, or you can save time and effort by using an operating system designed for hacking. Kali Linux is a Linux distribution based on Debian, specifically designed for hacking and penetration testing. It comes pre-installed and pre-configured with numerous hacking tools, saving you the hassle of installing and configuring them yourself.
Installation Options
You can install Kali Linux as a main machine or as a virtual machine. For this blog, we’ll install it as a virtual machine. Using virtual machines offers many benefits, including complete isolation from your main computer. If the virtual machine breaks or needs to be reset, it won’t affect your primary operating system.
Downloading Kali Linux
To get started, download the virtual image of Kali Linux from the given link below.
Download Links
- 64-bit Computers: [Click Here]
- 32-bit Computers: [Click Here]
- Apple Silicon ARM Computers (M1, M2, M3, etc.): [Click here]
Enabling Virtualization
Before proceeding, ensure virtualization is enabled on your computer. This step is necessary for running virtual machines on Windows or Linux. Apple macOS users can skip this section as virtualization is enabled by default.
Checking Virtualization Status
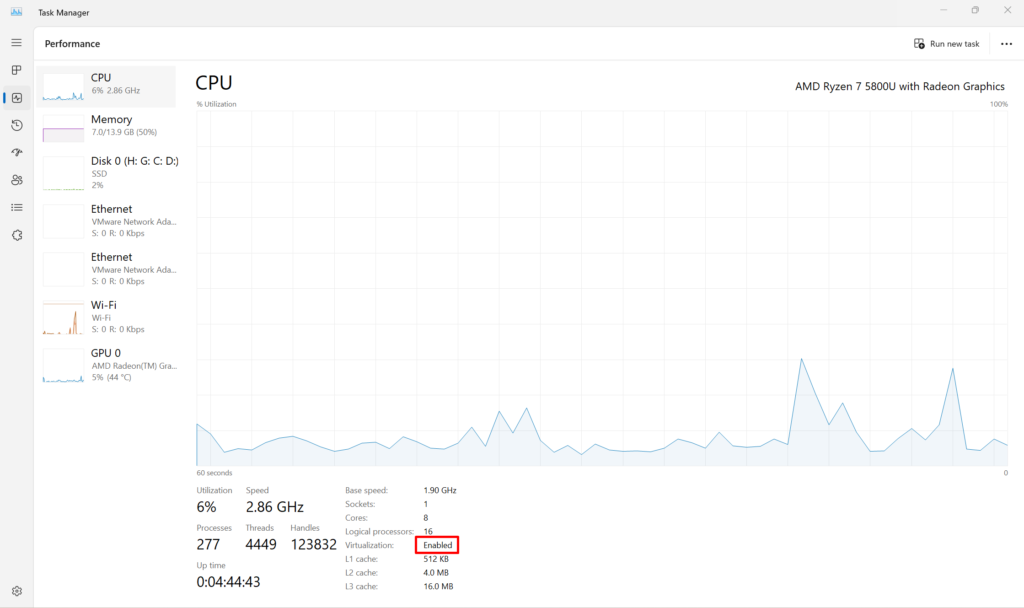
On Windows, check if virtualization is enabled:
- Open the Start menu.
- Search for and open Task Manager.
- Click on “More details”.
- Go to the “Performance” tab.
- Look for “Virtualization” and check if it says “Enabled”.

If virtualization is enabled, you can skip to the next blog. If it says “Disabled”, follow the steps below to enable it.
Enabling Virtualization in BIOS
To enable virtualization, restart your computer and enter the BIOS settings by pressing a key combination (usually one of the F keys) during boot. Refer to the table below for the key specific to your computer brand.
| Brand | Key |
|---|---|
| Dell | F2 |
| HP | F10 |
| Lenovo | F1 or F2 |
| Asus | F2 or Delete |
| Acer | F2 |
Once in the BIOS settings:
- Navigate to the configuration window (use the right arrow key).
- Find “Intel Virtualization Technology” or similar.
- Use the down arrow to select it, press Enter, and enable it.
- Save and exit the BIOS settings.
Example Steps in BIOS
- Use the right arrow to go to the “Configuration” window.
- Navigate to “Intel Virtualization Technology”.
- Press Enter, select “Enabled”, and press Enter again.
- Move to the “Exit” tab, select “Exit Saving Settings”, and confirm by selecting “Yes”.
- The computer will restart with virtualization enabled.
After restarting, check the Task Manager again to confirm virtualization is enabled. If you encounter any issues, please ask in the Q&A section for assistance.
By following these steps, you will have virtualization enabled and be ready to install Kali Linux as a virtual machine in the next blog.


